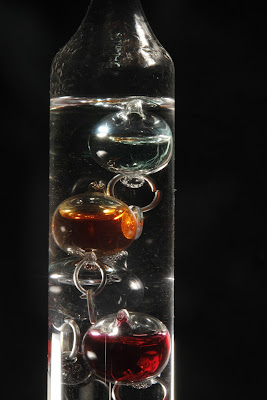
Hello and welcome back to Impacted Images. This is the post for today, featuring my latest image, "Galileo's Thermometer."
This is the original untouched image:
I took this image with a Canon 7D and an 18-270mm lens zoomed in to 42mm. To camera left, subject right I set up a Canon Speedlite 580EX II firing at 1/8th power and Zoom set to 105.
I used 1/250th shutter speed to eliminate shake and f-18 for better sharpness. I also used ISO 160 for minimum noise.
The reason I chose to shoot with a black background was so the colors in the bulbs could pop out better. With a white background, there was a lot of reflection and the thermometer was almost indistinguishable from the background.
I started in Adobe Camera Raw by adjusting the Brightness, Blacks, Contrast and Clarity. For a more detailed view, I cropped in a little more tightly.
Next, I opened Photoshop and used the Alien Skin Exposure 3 plug-in. I chose Color Film and the Fuji Provia 50 preset. I chose this preset over the other since it darkened the rest of the image and added some more saturation to the bulbs.
Finally, I added a Brightness/Contrast adjustment layer and set the Brightness slider to 20. I did not touch the Contrast slider since there was already enough contrast in the image.
Here in the finished image:
Thank you very much for reading this post. I will continue to post more image overviews everyday.


Really nice job on these!!! I looked through your previous post and you've got some good solid images here! You've got a really good eye for composition---keep up the good work!
ReplyDeleteAll my best,
-Scott Kelby
Editor & Publisher, Photoshop User magazine