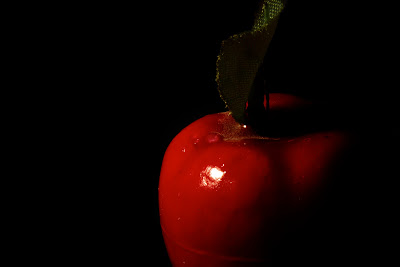
Good afternoon and welcome to Impacted Images. This post features my newest image, "Toy Man."
This is the original image:
I took this image using a Canon 7D and 18-270mm lens zoomed in to 270mm. I used 1/250th shutter speed to eliminate shake and f-20 for best sharpness and depth of field. I also used ISO 125.
A Canon Speedlite 580EX II was at subject left, camera right firing at 1/64th power.
First, I used Adobe Camera Raw and adjusted the Exposure, Brightness, Blacks, Contrast, and Clarity. I then imported it into Photoshop CS5 and started to work on the photograph.
I've made the move to Wordpress.
You will be automatically redirected in 5 seconds.
If not, please click here:
Thank you.
Monday, November 28, 2011
Wednesday, November 9, 2011
Today's Image: "Portrait of an Apple"
Good afternoon everyone and welcome once again to Impacted Images. This is today's image overview, with my newest photograph, "Portrait of an Apple."
This is the original image:
I took this image with a Canon 7D and an 18-270mm zoomed in to 270mm. I used 1/250th shutter speed and f-36 for best sharpness. I also used ISO 125 for low grain.
A Canon Speedlite 580EX II was at camera left, subject right, firing at 1/32nd power with a Sto-Fen softener attached.
I first cropped this photo in Camera Raw and adjusted the Vibrance, Clarity and Brightness. I then went into Photoshop and selected the apple itself with the Quick Selection tool. Using the Refine Edge command in Photoshop, I adjusted the selection to make it look better.
Next, I used Nik Color Efex Pro 3.0's Color Stylizer filter for warmer tones. I set the Contrast slider to 18 and the Saturation slider to 42. I wanted more warmth and contrast while still keeping the image realistic.
Finally I added a Brightness/Contrast adjustment layer and added a small amount of Contrast.
Here is the final image:
Thank you for visiting Impacted Images. I will post more image overviews soon.
Subscribe to:
Comments (Atom)


